
How to Strip Floors and Wax
Floor maintenance is essential for keeping commercial and residential spaces looking clean and professional. Stripping and waxing floors is a crucial part of this maintenance routine, particularly for businesses, hospitals, schools, and public buildings. This guide provides a step-by-step approach to stripping and waxing floors, ensuring a polished, long-lasting finish.
Understanding the Importance of Stripping and Waxing Floors
Over time, floors accumulate dirt, scuff marks, and old wax layers that can make them look dull and worn. Stripping removes these old layers, while waxing provides a protective barrier that enhances the floor’s appearance and durability. Regular floor maintenance also improves safety by preventing slips and falls.
Necessary Tools and Materials
Before starting, gather the following tools and materials:
Floor stripper (suitable for the type of flooring)
Floor finish (wax)
Mop and mop bucket
Floor buffer (swing machine) with stripping pads
Wet/dry vacuum
Scraper or putty knife
Rubber gloves and safety goggles
Protective clothing and footwear
Floor neutralizer
Clean towels or microfiber cloths
Signage (Wet Floor and Caution signs)
Step-by-Step Process to Strip and Wax Floors
Step 1: Prepare the Area
Remove all furniture, rugs, and obstacles from the area.
Place caution signs around the work area to prevent accidents.
Sweep or vacuum the floor to remove loose dirt and debris.
Step 2: Apply the Floor Stripper
Dilute the floor stripper according to the manufacturer’s instructions.
Use a mop to evenly apply the stripper to the floor, working in sections.
Allow the stripper to sit for the recommended dwell time (typically 5-15 minutes) to break down old wax.
Step 3: Scrub the Floor
Use a floor buffer with a stripping pad to agitate and lift the old wax.
Scrape any stubborn areas with a putty knife or scraper.
Use a wet/dry vacuum to remove the stripper solution and wax residue.
Step 4: Neutralize the Floor
Apply a floor neutralizer to ensure all stripper residue is removed.
Mop the floor with clean water and allow it to dry completely before waxing.
Step 5: Apply Floor Wax
Use a clean mop or wax applicator to apply the first coat of wax in thin, even layers.
Allow the wax to dry for at least 30 minutes to an hour before applying additional coats.
Apply 2-4 coats for best results, ensuring each layer is completely dry before adding another.
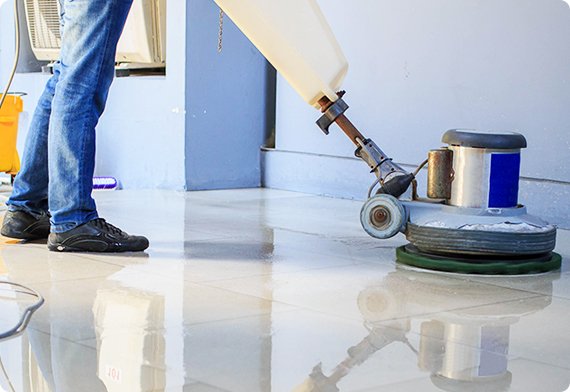
Step 6: Buff and Polish
Once the final coat is dry, use a floor buffer with a polishing pad to enhance the shine.
Inspect the floor for any uneven areas and touch up as needed.
Post-Waxing Maintenance
Avoid heavy foot traffic for at least 24 hours.
Clean floors regularly with a damp mop and pH-neutral cleaner.
Reapply wax as needed, typically every 3-6 months for commercial spaces.
By following these steps, you can maintain a clean, professional-looking floor that enhances the aesthetics and safety of your space.
For professional floor stripping and waxing services, contact us today. Our expert team ensures your floors remain spotless, durable, and safe. Call us now to schedule an appointment!